Share

Set Up & Maintenance

How To Set Up Burton EST Bindings On The Channel System

Setting your stance with the Big B

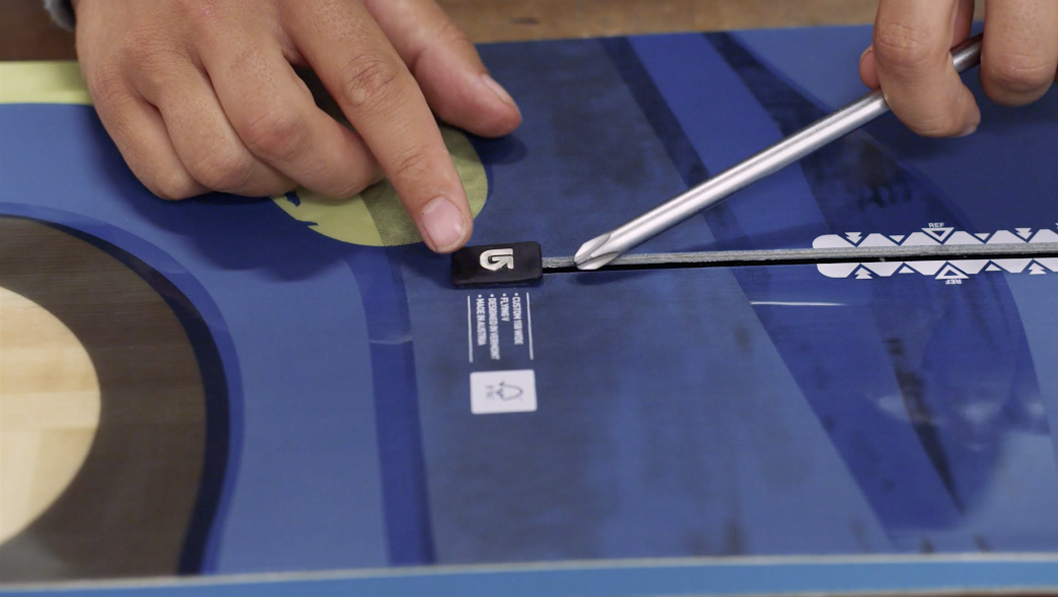
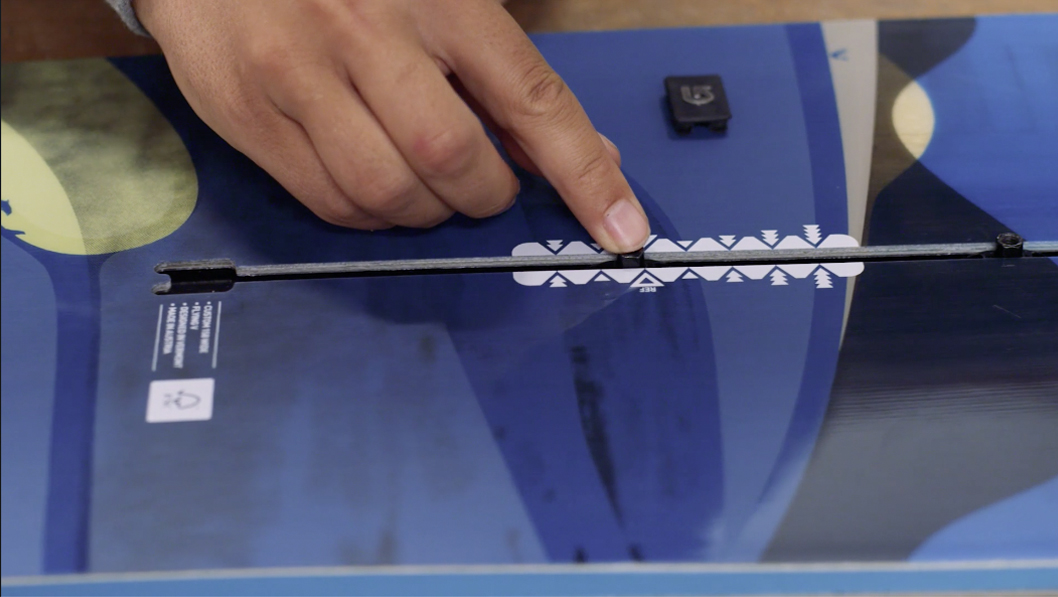
These days Burton snowboards all come with two milled channels for mounting your bindings, rather than the standard four-hole inserts. They’ve also licensed this technology to the Canadian brand Endeavor.

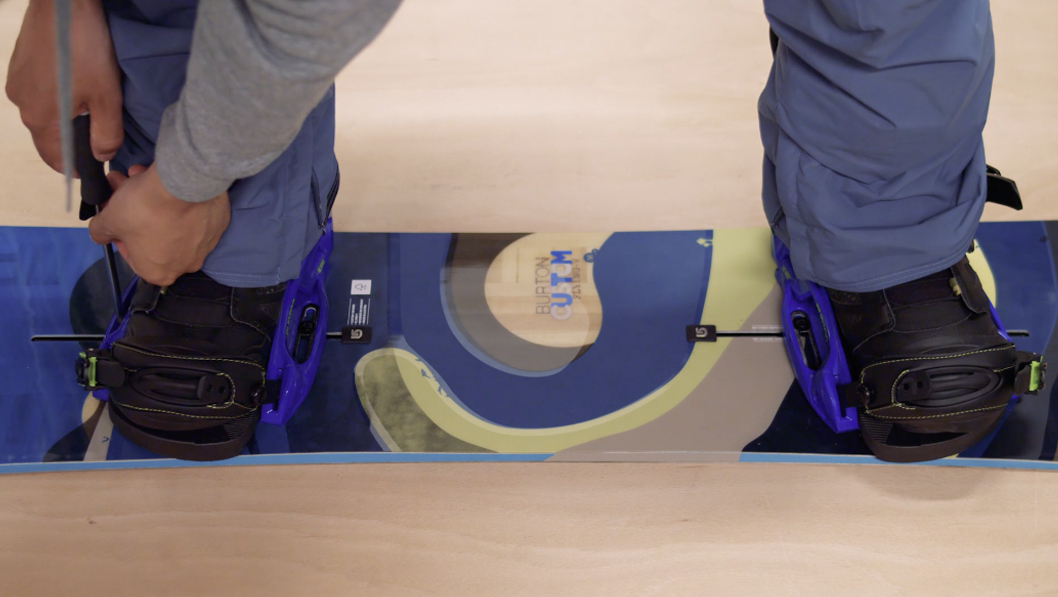
The advantage of this system is that it only requires two screws, and you can adjust your stance width quickly and easily without being limited by hole position. Burton also claim the channel provides a more even flex throughout the length of the board.

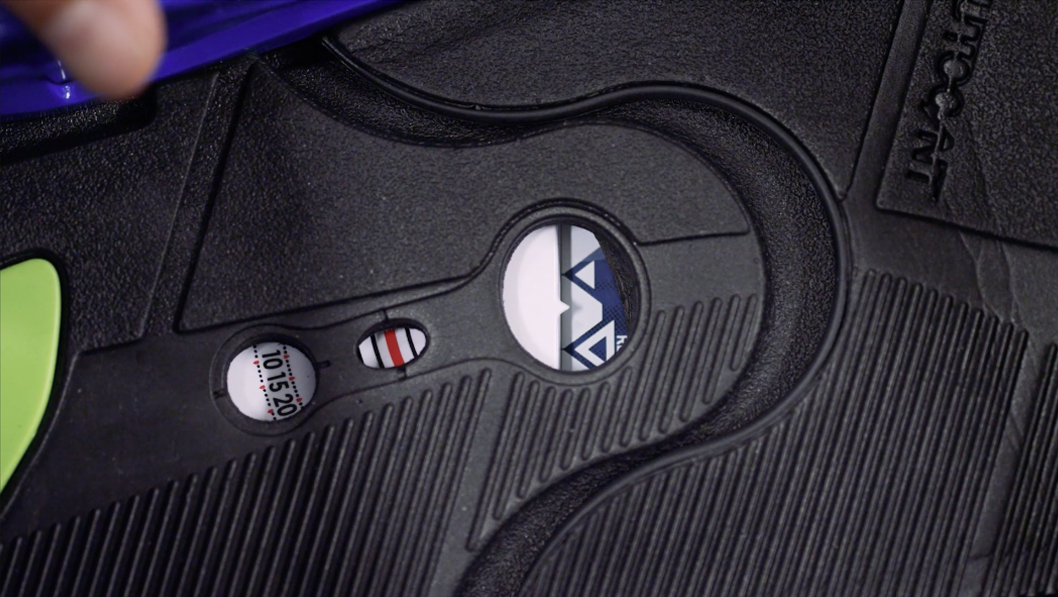
To get the most out of it, they recommend using their EST range of bindings. These are designed with a slot at either side for your screws, and a more flexible footbed that offers increased board feel compared to a standard binding with metal or plastic disks.

To attach your bindings, start by removing the rubber stoppers in each of the channels. Levering them up with a screwdriver can make it easier.

Now place a t-bolt in the gap, and slide it up. Repeat with a second t-bolt, then replace the stopper and do the same on the other channel.

Underneath the binding you’ll see a plastic ridge that rotates the angle dial on the top. This ridge needs to be lined up with the channel for initial placement, so that it slots inside.

Move the t-bolts apart so that they’re roughly the same width as the binding, and set the binding down on top.

Now place one of the grooved washers and a screw in each slot.

Lightly screw down each side.

With the binding loose, set the width by sliding it in either direction. A window in the centre of the footbed reveals the board’s reference points.

You can now rotate the binding and set your preferred angle according to the numbers in the window.

You can also move the binding forward and back to ensure your boot sits evenly across the board with minimal overhang.

When you’ve found your stance, screw both sides down tightly to secure the binding.

One great thing about the EST system is that you can make quick adjustments on the fly, and set your width while actually standing on the board. Simply loosen the screws on either side of the binding and wriggle it sideways until it feels right. You can alter the angle at the same time by twisting your foot. Then tighten it down again.

If you haven’t bought an EST binding, most standard bindings will still fit on the Burton channel system. Turn the disks so that the holes on either side line up with the channel, then set your angle and screw down as normal.

Share

Newsletter Terms & Conditions

Please enter your email so we can keep you updated with news, features and the latest offers. If you are not interested you can unsubscribe at any time. We will never sell your data and you'll only get messages from us and our partners whose products and services we think you'll enjoy.

Read our full Privacy Policy as well as Terms & Conditions.

production