Share

Set Up & Maintenance

How To Repair Your Snowboard Base

Treating your wounded snowboard

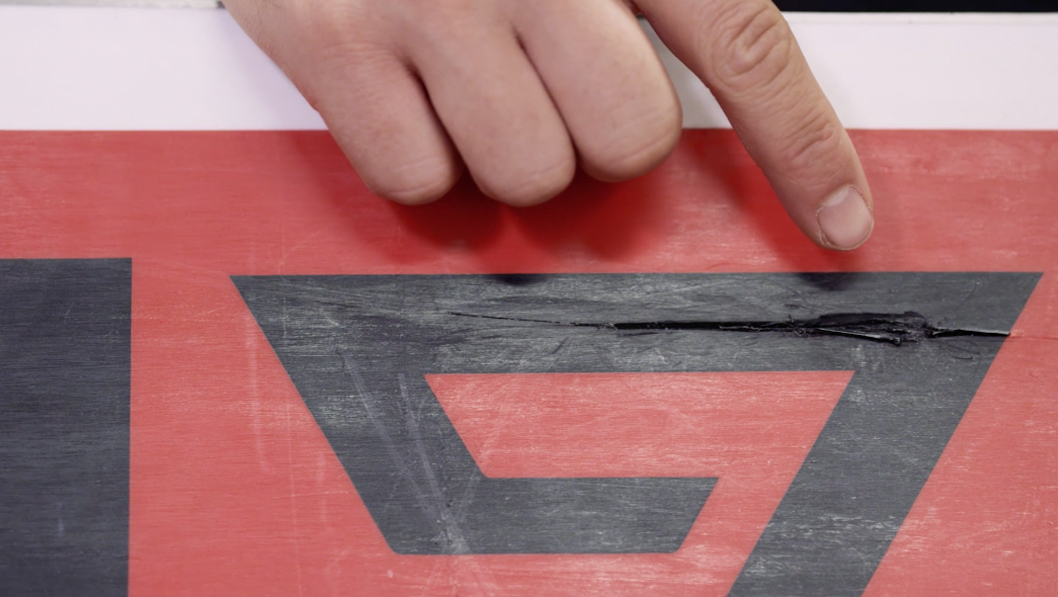
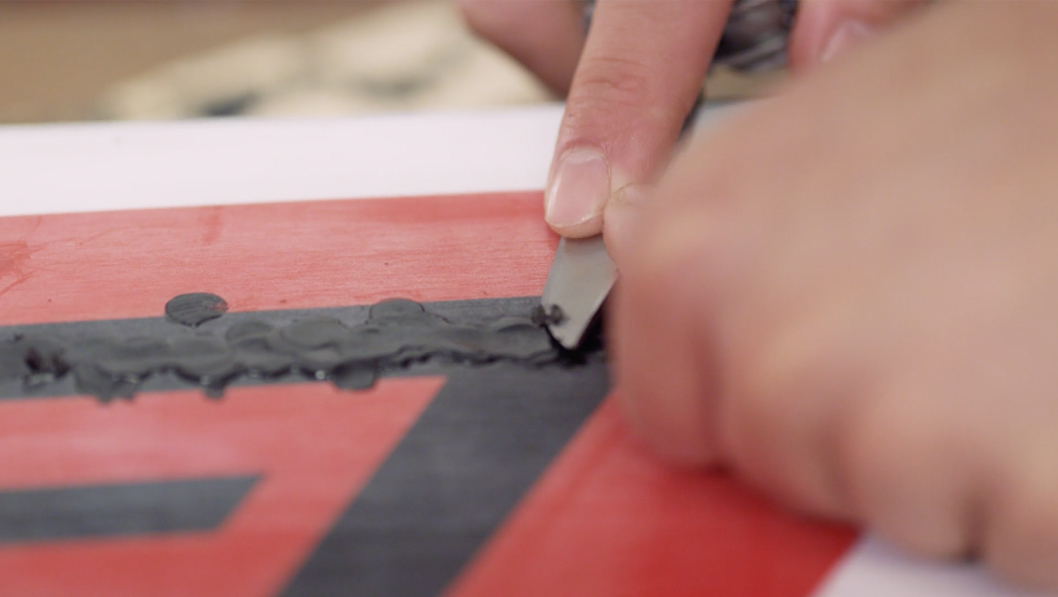
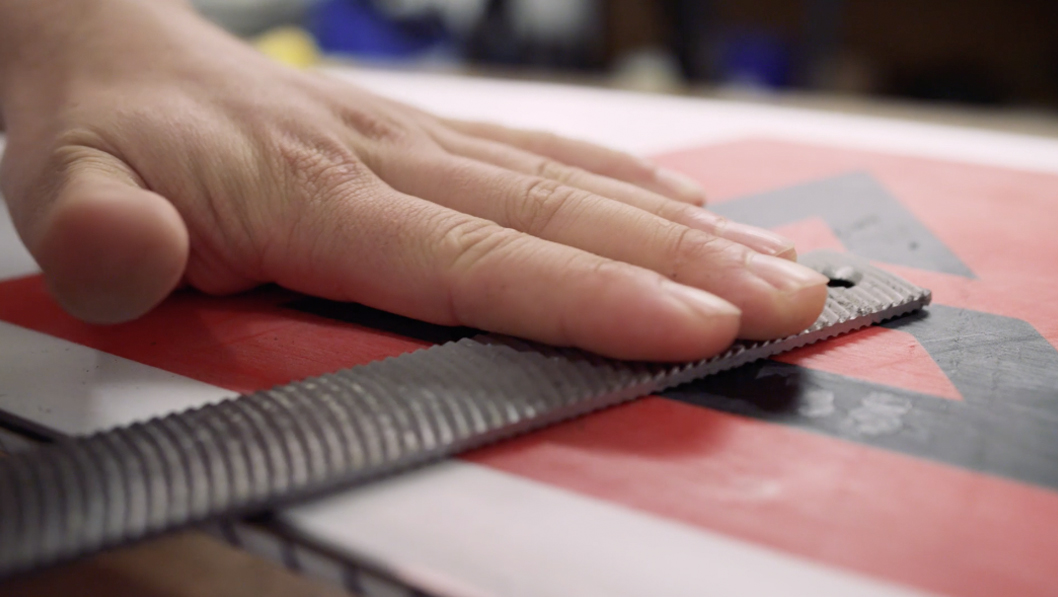
Theres nothing worse than your day up the hill coming to a grinding halt when you hear the sound of rock scraping along the base of your board, to then finding a nasty ding underneath your prized possession. But don’t fear the worse, more often than not these deep scratches can easily be repaired in the comfort of your own home by following these simple steps.

1. Gather your equipment

Try to have everything laid out on the table before I start doing anything, just so you know it’s all there to hand. Have your P-tex candle, a blade or scalpel, a candle, a lighter, a scraper and some scrap wood/metal all at the ready.

2. Clean Your Base

You want to make sure it’s clean of whatever was on there when you damaged it so you can get all the dirt out of the grooves, and so it’s ready to absorb the new wax. Use a brush at first then move on a clean cloth. Spray base-cleaner on the board, and wipe it dry with a cloth. Cut away any material that is sticking out of the board with a sharp blade.

3. Melt p-tex into any gouges

Be careful, ‘cos when p-tex is hot, it sticks to anything. First light an everyday wax candle and place it nearby – when working with p-tex, it’s easier to use a constant flame than a lighter.

Take a stick of p-tex and hold it in the flame until it glows blue and then sets alight – then carefully drip the p-tex into the damaged area. Have a scrap of wood or metal scraper nearby to soak up the initial drips.

Once the p-tex is melting constantly, move it quickly over the gouge and run it along its length, allowing the drips to fill the space.

Try to keep the flame low to the board to reduce getting carbon in the mix, and if it goes out, stub the end on your scrap wood or metal scraper, and re-light

Having made one or two passes, stub out the p-tex stick and allow the molten layer in the gouge to cool for a while. The deeper the gouge, the more layers you will need to fill it.

Now repeat the process until the damaged area is completed filled, and the new p-tex is standing proud of the base.

Leave the board to completely cool.

4. Scrape off any excess

Remove any excess p-tex material from the sides of the wound using your knife.

Take a bastard file and run it diagonally across the repair. Go gently and patiently in the same direction, being careful not to rip out the filling.

When the repair is almost flat, take a metal scraper or a sharp-edged plastic scraper and run it across diagonally.

Work in sections, until all excess p-tex has been removed and the repair is completely flush with the base.

That’s it. You’re now ready to wax.

Share

Newsletter Terms & Conditions

Please enter your email so we can keep you updated with news, features and the latest offers. If you are not interested you can unsubscribe at any time. We will never sell your data and you'll only get messages from us and our partners whose products and services we think you'll enjoy.

Read our full Privacy Policy as well as Terms & Conditions.

production