Published in Whitelines Magazine Buyer’s Guide Issue, Winter 2010-2011
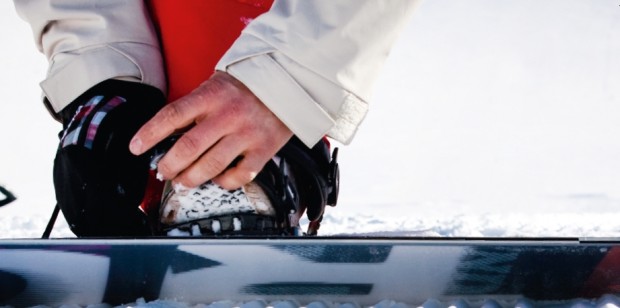
Bindings are the crucial interface between your feet and your board. Once nothing but strips of rubber or even bungees, today they are anatomical wonders of design and engineering. Too often, however, bindings play second fiddle to the more eye-catching purchases, but as with boots, a good pair can make the difference between agonizing cramp and a comfy day’s shred. Here’s our guide to getting the right set…

Assess your budget
Prices vary wildly, from about 70 quid for the cheapest models to well over £200.It’s not strictly the case that you get what you pay for – the most expensive models tend to be made of carbon and are super stiff and responsive; not necessarily what you need if you’re just starting out or need a soft-flexing pair for jibbing at the snowdome. £150 is the most popular pricepoint and will give you a massive choice of solid models.
Assess your riding style
As with boards, bindings are generally designed with different styles of riding in mind. A binding’s flex is determined by both the base plate and the highback. Stiffer = more responsive (better for carving, pipe riding, powder turns and supporting heavy landings) Softer = more playful (more forgiving for learning, better for jibbing, freestyle, boning out tricks and so on). Check the flex rating on our reviews, and if you’re looking at a pair in the shop, be sure to ask the assistant for more details on how stiff they feel to ride.
Have you bought a Burton board already?
If so, your choice of binding might be limited. Burton’s ‘Infinite Channel System’(ICS) has the benefit of more stance width options, since you can slide the binding up and down a slot rather than picking from a limited number of holes. However it only works with their own bindings. Burton’s classic ‘3D’ insert pattern is also different to the norm, using a triangular placement of three screws rather than the square ‘4×4’pattern used by the vast majority of brands. Some third party bindings will work with the 3-D system, but check with the shop before you buy. If you’ve bought anything other than a Burton board, you can choose pretty much any binding (including Burton bindings) and it should fit.

Features to look out for
Flex – As described above, a binding’s fl ex will dramatically affect the performance. Choose a fl ex which suits your preferred riding style and ability.
Size – Bindings usually come in small to large. Make sure you’ve got the right pair for your boot. As a rule of thumb, large is UK9 and over, but it will vary from brand to brand. N.B Unless buying the same brand boot and binding, don’t go purely by the size guide on the box. Some makes of boot are much bulkier than others, so if you’re on the borderline you might need to get a bigger binding for the strap to fit round easily. If in doubt, try them together in store!
Heel straps – Padding is good. The more you pay, the comfier the strap tends to be. Look out for anatomical shapes, and if possible, try them with your boots before you buy. A snug heel strap is the vital link between you and your board.
Ratchets – It sounds geeky, but some ratchets work better than others. Try doing the bindings up over your boot, seeing how quick they are to use and most importantly of all, checking how easy the yare to release. There’s nothing more annoying than being stuck in your binding while your mates are scooting towards the lift .
Aluminium or plastic? – A matter of preference. Most brands’ bindings are made entirely of very tough plastic – the advantage being that plastic is light and easily moulded into complex shapes. Others (such as Ride) have stuck to ‘aircraft grade’ aluminium for the baseplate, which they claim is stronger while being less bulky. Still others (such as Union) combine a plastic baseplate with an aluminium heel cup. Don’t worry too much about the material – go for the comfiest pair first and foremost.
Tool-free adjustment – There are numerous tweaks you can make in order to customize your binding for your own needs. Toe ramps adjust the length of the baseplate so that your foot doesn’t overhang the front; heel and toe straps can be adjusted for the size of your boot; and screws on each side of the binding allow you to swivel the highback so that it’s perpendicular to the edge of your board. Equally important is the forward lean adjuster –usually a block on the back of the highback. This changes the angle your calf naturally sits at and dramatically alters the riding feel. More angle = quicker heel edge response but less freedom. If you’re the kind of guy who likes to mess about to get the perfect binding set-up, look for a binding with hand operated adjusters – meaning you don’t need to reach for your tool every time you get the urge for a fiddle.
Toe straps vs. cap straps – For years everyone was perfectly happy pulling their toe straps over the top of their boots; then it became fashionable to pull them diagonally over the end of your toes, and the world went mental for Burton’s ‘cap strap’. The thinking behind it is that tightening over the corner pulls your foot back into the binding. Then Burton discovered someone else had a patent on the idea and changed their design, while the fashionista’s decided maybe ‘over-the-top’ worked fi ne after all. These days many toe straps are elasticated in the middle so you can use them either way. Ultimately, it doesn’t matter that much anyway!!
Extra padding – It stands to reason that a little extra cushioning on the baseplate and highback won’t go amiss. Worth keeping an eye out for.
Weight – As with all things snowboarding, saving weight is the aim of the game; it makes spinning, ollieing and carrying your board back to the chalet less hard work. Which is why, perversely, the more holes there are in your binding these days (and the less material) the more you tend to pay.
Spares – It’s a fact of life that with so many parts under so much strain, bindings are the weak link in your snowboard armoury. If you ride regularly or are spending a season in the mountains, there’s a good chance you’ll lose a screw, break the spring in a ratchet or snap a strap. For this reason it’s worth getting a pair from a brand with solid distribution; shops will oft en replace parts for free or minimal charge, but you don’t want to be stuck in resort hundreds of miles from the nearest ‘Random Binding Inc.’ dealer.
Is rear entry for me?
The vast majority of bindings are standard two strap affairs; while they work well and have evolved into lightweight and comfortable products, they are still a bit inconvenient since you have to sit on your arse to do them up… then do them up some more after you’ve set off and you realize they’re not quite tight enough!
Over the years, many attempts have been made at the ultimate ‘step-in’ binding system. Burton dabbled with an SPD bike style clip, Vans – in collaboration with a long-forgotten brand called Switch – had a go, but in the end nothing offered the comfort and performance of the old school design (“You can prize my strap-ins from my cold dead hands,” ran a famous Ride sticker in the late 90s). One alternative system remained, championed by Flow.
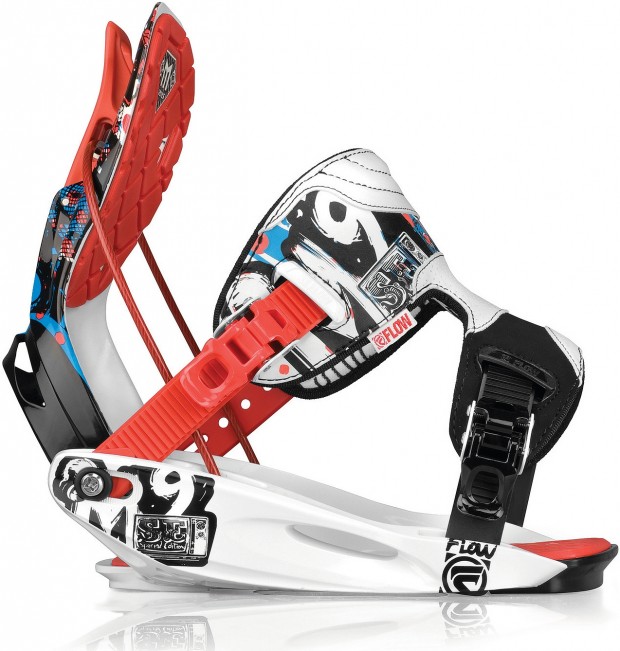
Flow’s speed entry bindings employ a folding highback, attached via a steel cable, which enables you to enter the binding from the rear. The heel strap looks much like a normal binding but you only adjust it once to fit your boot; aft er that you slot your foot in and out from the back, and snap the binding shut by pulling up the highback. You don’t need special boots and the simple system works far better than any ski-stylestep-ins – which is why it’s built up an army of loyal fans.
There are now several brands offering similar rear entry bindings, including K2, Apo, SP and Gnu. Should you buy a pair? There’s definitely a Marmite element to them: fans point to no quicker, easier turnaround at the top of the lift , less bruised hands and of course, no more wet arse; opponents say they don’t offer quite the same feel as a regular two-strap. Your best bet if you’re toying with the idea is to try a demo pair and see if they float your boat.


