How To Frontside Noseblunt a Gap
-
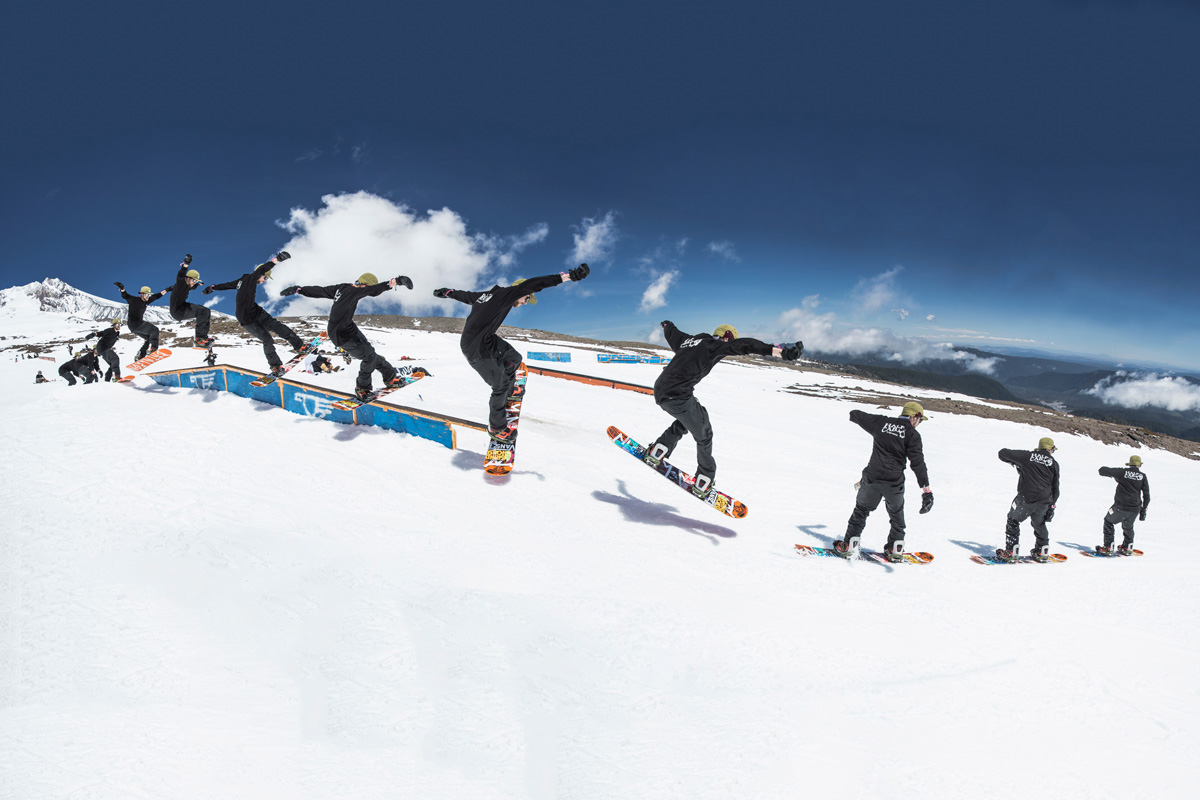
Photo: Ed Blomfield
-
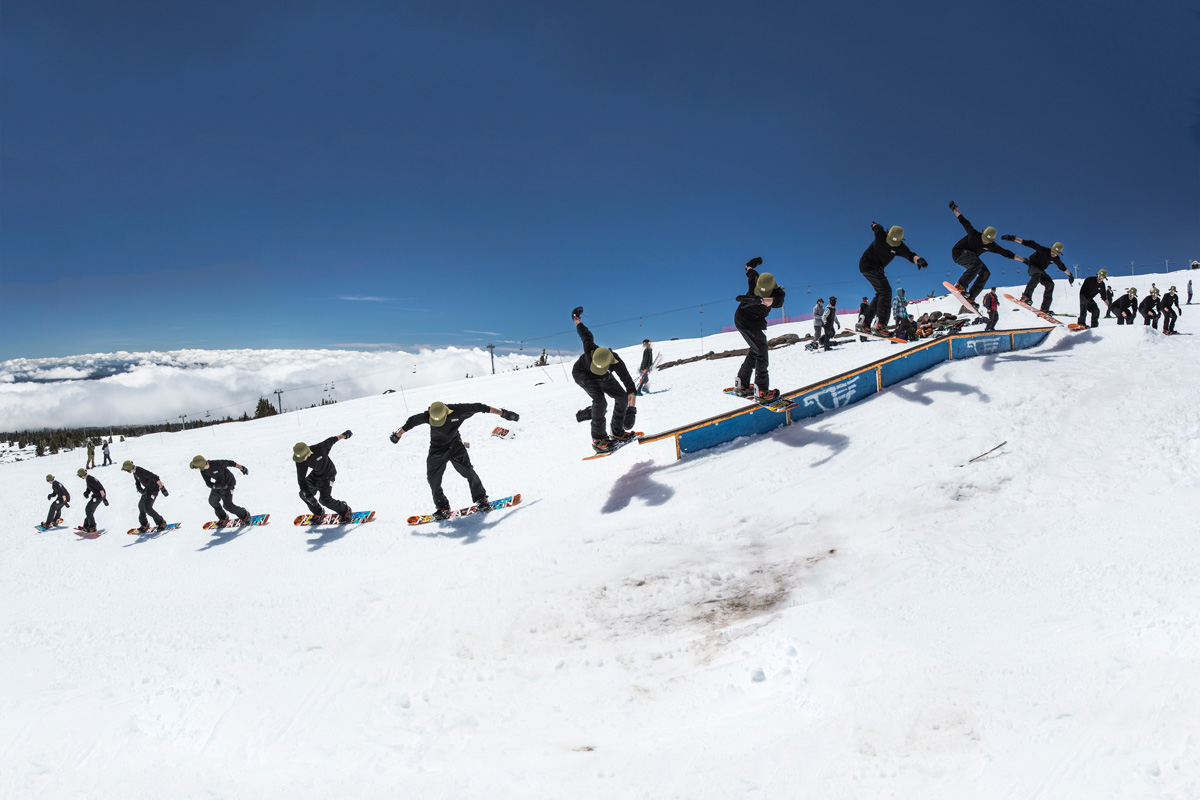
Photo: Ed Blomfield
-
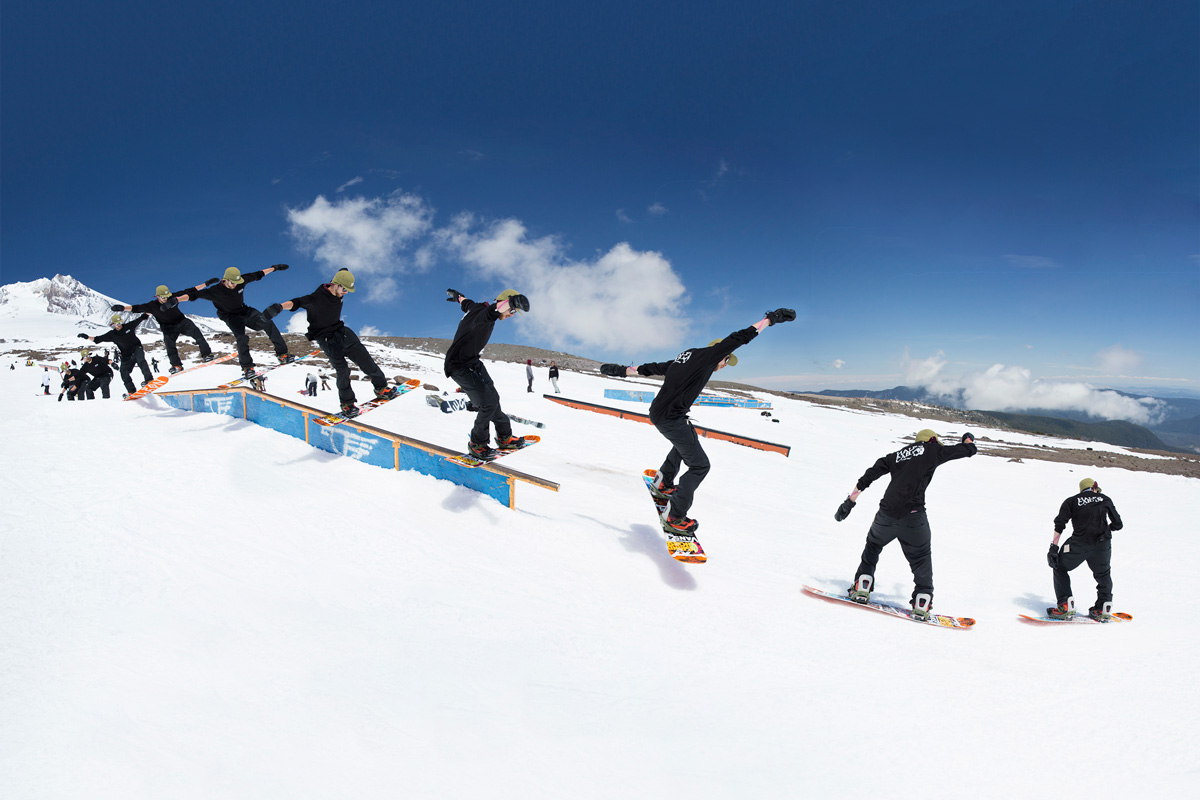
Photo: Ed Blomfield
-
Photo: Sam McMahon
How To Frontside Noseblunt a Gap
Rail progression usually goes as follows: ride-on, side-on, gap-on. Once you’ve got the hang of sliding over ground-level boxes, and have mastered hopping on to street-style rails from the side, the next step is to attack a kinked rail with enough speed to clear the first section altogether. In fact, as long as you commit fully, this can actually be a lot easier than riding though the kinks. UK rail wizard Gaz Andrews is here to get you started with a few of the simpler ones to get you started.There’s no limit to what can be achieved once you crack shooting the gap, as that extra airtime allows for spinning on. Or, like Jamie Trinder at last year’s British Championships, you could even go for a rodeo-to-railslide…. Anyway, first thing’s first – take it away Gaz:
This first appeared in Whitelines issue 119
A bit of name clarification here – bluntslides and nosebluntslides come from skateboarding, but with the absence of trucks and wheels it’s a different beast on snow. Also, ‘frontside’ means approaching the rail from the side where your body is facing the feature – in goofy-footed Gaz’s case, from the right.
For this trick I tend to take a little bit more speed than usual, as it helps you to lock in as you throw all of your weight over the rail – plus going really fast is a lot of fun! Make sure you have backside noseslides down before you try this, so you know what to do once you land on the rail.
Make sure you definitely make it to 90 degrees – we don’t want any zeaches!
As you approach the rail, prepare for a decent pop as you need to get yourself right over the rail to lock in. Wait until your front foot is just leaving the kicker before you pop to get the most out of it.
Now that you’ve popped, swing your back foot over the rail whilst holding your rear shoulder back to stop the rotation at 90 degrees. Make sure you definitely make it to 90 though – we don’t want any zeaches!
First contact with the rail is pretty make or break for this trick, and where I feel the little bit of extra speed comes in handy. Once you have swung your back foot over, dip your nose down and catch the rail under your front foot (or just beyond it) and then let the board level out. To get a proper nose-blunt you should you have your chin and knee aligned vertically over your front foot.
Now that you’re on the rail, you want to try to keep that balance point to get to the end. Your momentum should take you there, but if you find yourself falling off the opposite side of the rail – as is common with this trick – then you’ll need to adjust that front foot catch; make sure you land on the rail with all of your weight over your front foot.
I love this trick because of the way it feels to pop in and out of – you can really tweak that back foot out, and it’ll still feel stable. You can pop out and straighten up easily, as you’ve been holding your rear shoulder back throughout the trick. I personally like to lift my tail again as I turn off the end – mostly to style it out, but also because it helps me bring my weight back to the centre of the board, ready to land.
Now you’re riding away at Mach 10 feeling like a don, hike up and do a few more. Once you have it on lock I guarantee it will be one of your best-feeling tricks.

