How To Switch Backside Bluntslide a Gap
-

Photo: Ed Blomfield
-
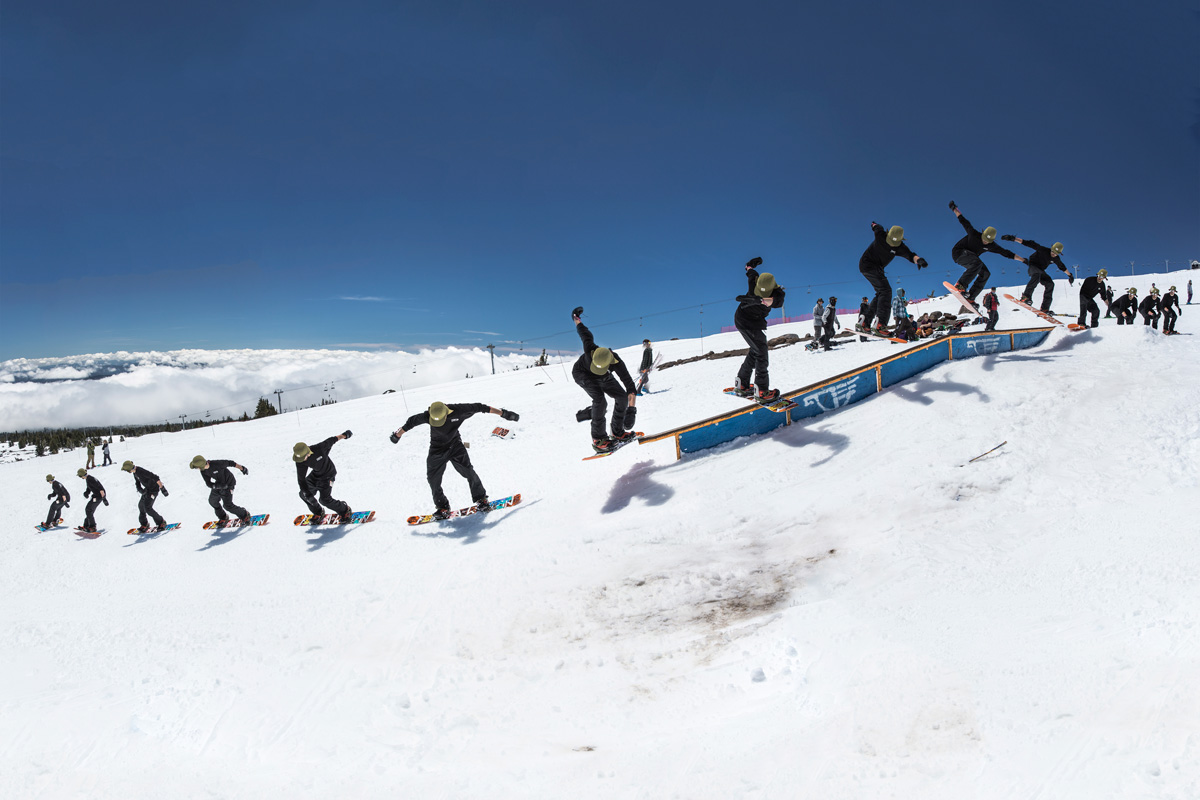
Photo: Ed Blomfield
-

Photo: Ed Blomfield
-

Photo: Sam McMahon
How To Switch Backside Bluntslide a Gap
Switch rail tricks aren’t as hard as you think – it’s really only the initiation that you need to work on. Once you’re sliding along the rail at 90 degrees, it’ll feel pretty normal. It’s worth trying a few of your standard tricks switch once you’ve got them dialed – some feel even better done the other way!
Before trying these, I’d make sure you’re comfortable riding switch and doing cab 180s (aka switch frontside 180s). It also wouldn’t hurt to learn backside boardslides as well.
The pop is going to feel strange the first few times, but don’t worry – it will come
The pop is going to feel strange the first few times, but don’t worry – it will come. It’s very easy with this trick to feel that you need to carve in at a sharp angle, but don’t. Just approach the rail with a good amount of speed and stay parallel with the rail as you approach the the take-off.
Pop mostly off your heel-edge but still with a relatively flat base. Push your switch front foot over the rail and adjust your weight over what is normally your front foot.
To stop yourself over-rotating, which is another common problem with this trick, just dip the trailing end of your board slightly when you land on the rail. That’ll get you locked in.
Once you’re on the rail, you’re basically just in a backside noseslide. Just as you do with that trick, keep your weight over your normal front foot, ride it to end of the rail and pop out into your normal stance.
Once you’ve got that on lock, try a 270 out – it’s one of the easiest 270s to throw!


