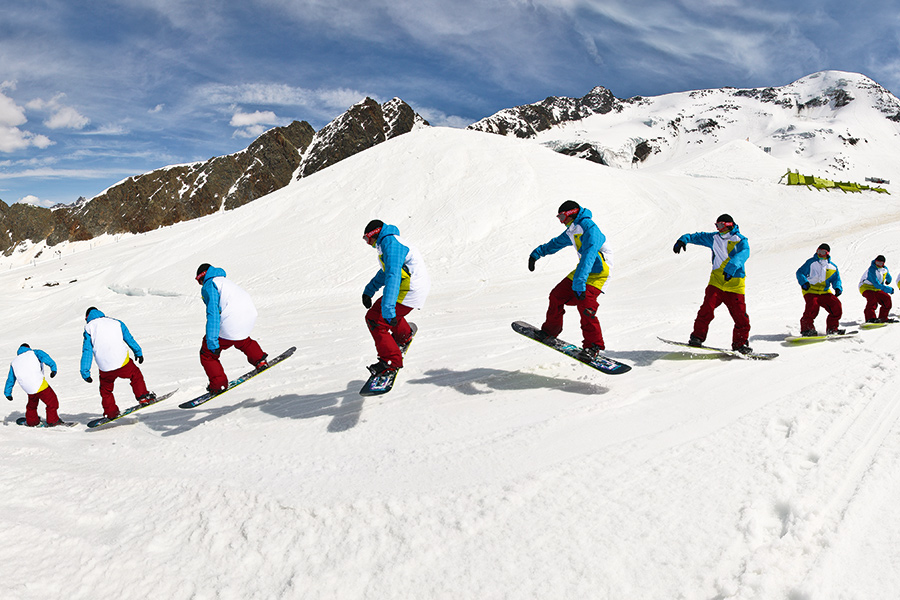
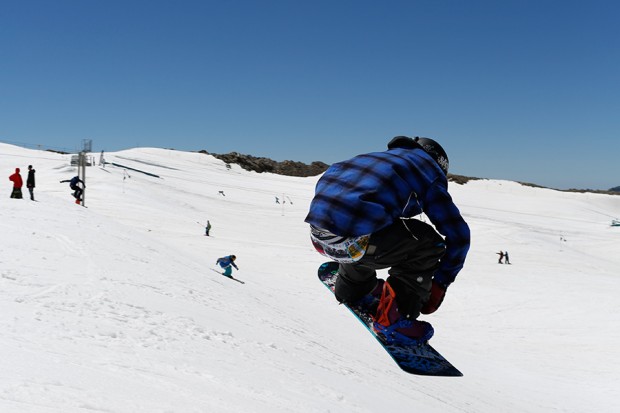
Once you’ve got flat ollies down and you want to start on your freestyle career, you’ll probably want to throw a 180. The frontside version (where you’re turning your front to the landing as you enter the air, like a heelside turn) should be your first point of call. Of course before you attempt this, you’ll first need to master riding switch (backwards) and you’ll really have to commit to getting that board around if you want to avoid catching your toe edge mid trick. So why the FS 180 instead of the BS 180? Because throughout the course of this trick you’ll always be able to see where you’re going. They’re fairly easy to throw, so chuck a few off some small piste bumps before taking them to the kickers of the funpark, and you’ll be reet…
 1. Stay relaxed and focus on the lip of the bump/kicker. Even if you’re going to just ollie off the flat, it’s worth looking for a spot of snow to use as your take-off point. Any marker will do – a shadow line or patch of darker/lighter snow. Make sure that what you’re trying to achieve is clear in your head.
 2. Approach on a flat base, with your weight centred over the board. Get nice and low by bending your knees – this will lower your centre of gravity and increase your board control. As you near the take-off, start to shift your weight a little more over your heels, but keep the nose pointing straight and your base fairly flat.
 3. ‘Pre-wind’ in preparation for take-off by pushing your leading arm slightly across your body in the opposite to the direction to the one you’ll be spinning. in. This pre spin is key before you ollie.
 4. Spring upwards off the tail, in the same way you perform a normal ollie, but as you do so, throw the frontside spin with your arms. How hard you need to throw your arms is determined by the size of your jump – if you’re jumping on flat ground and won’t be in the air for very long, then you’ll need to give it a good bit of welly; if you’re doing them off a decent-sized bump or a kicker then you’ll need to tone the spin down a bit.
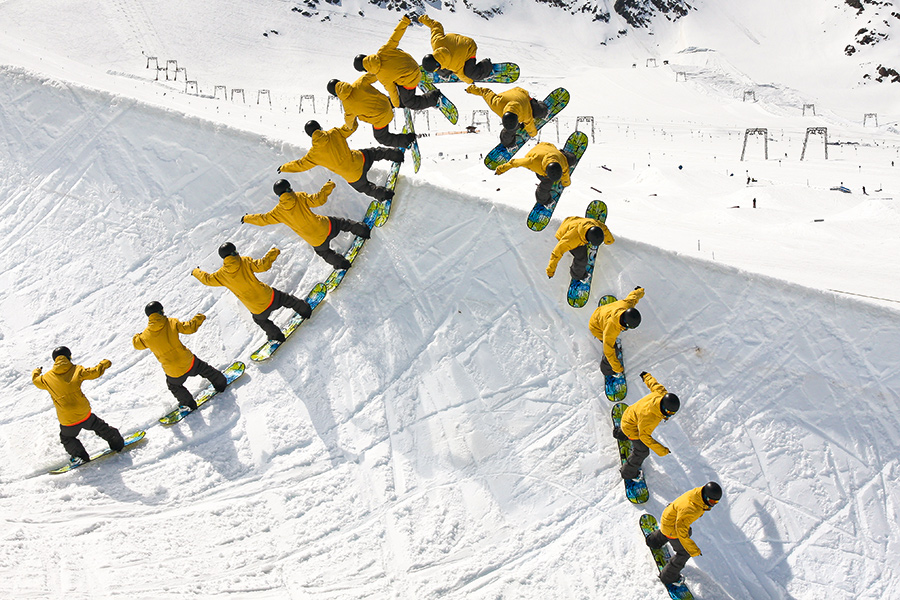
 5. As the board goes up nose-first, suck your legs up so that you begin to level out in the air. At the same time, you should be pulling the board around in line with your shoulders.
 6. On the descent, extend your legs and aim to land so that the nose of your board hits the ground first. The great thing is, if you don’t make it all the way around on a frontside 180 (let’s say you only do a frontside 130), then you simply land on this part of your board and slide the rest around.
 7. Ride away switch until you’re in control, then start turning or revert to your normal stance.
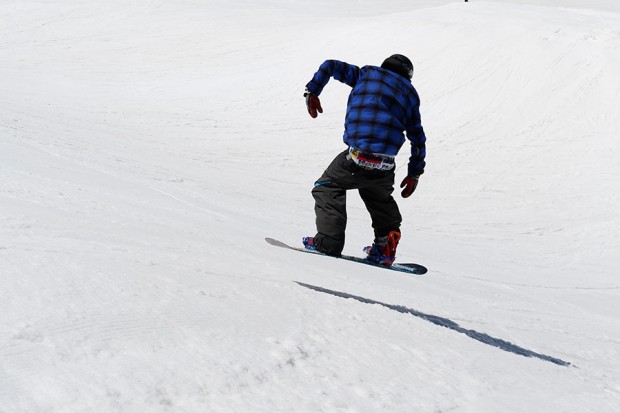 8. If you need more spin, go back and try it again with more force. If you over rotate your 180, try less force.

Top Tip
Once you’ve landed and are riding away backwards, try doing a switch version of the same trick (a.k.a. the ‘cab 180’) on the next hit, for a ‘back-to-back’ combo.
Which Edge?
There are no hard and fast rules when you’re spinning frontside for which edge you spin off. Some people prefer their toes; others prefer their heels. The transition may be able to decide for you – if the take off is quite flat then it will be better taking off from your heels; if it’s steep, it’s your toes. Experiment with both though, as it will only broaden your repertoire.